Microsoft Word has a built in accessibility checker that will help you avoid some common errors that limit your document’s accessibility. Consider running the checker as a regular part of your document workflow.
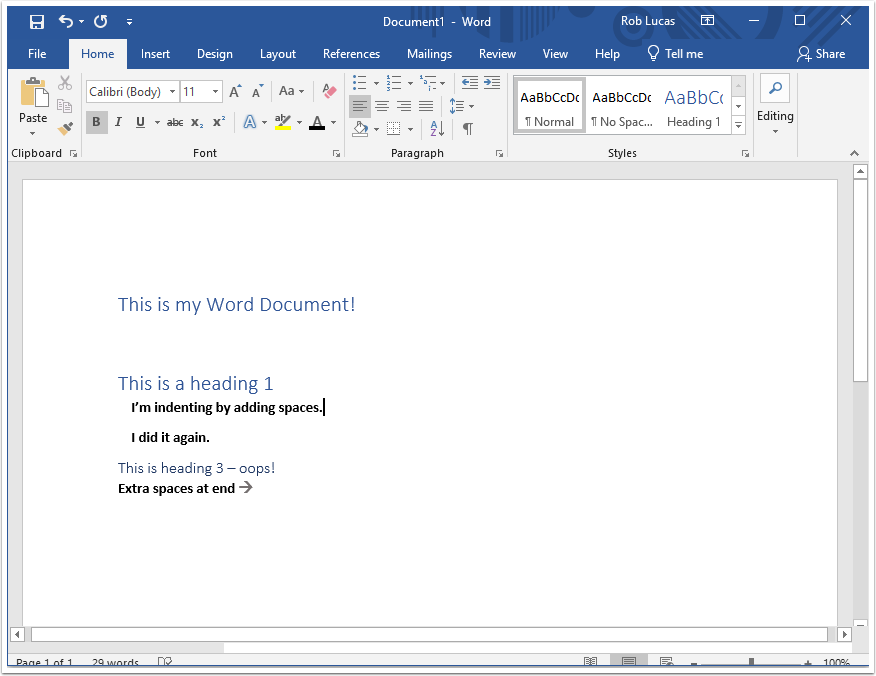
To use the Accessibility checker, first open a document in Word.
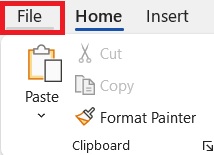
When you are ready to check your document, click the File menu.
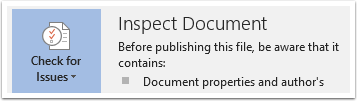
On the File menu, click the Info tab, then click the Check for Issues box next to the Inspect Document heading.
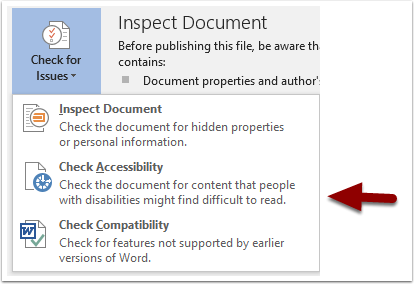
In the dropdown menu, select Check Accessibility.
You’ll be taken back to your document, but now the Accessibility window is open with your Inspection Results on the right. These results will list all the issues the checker has found.
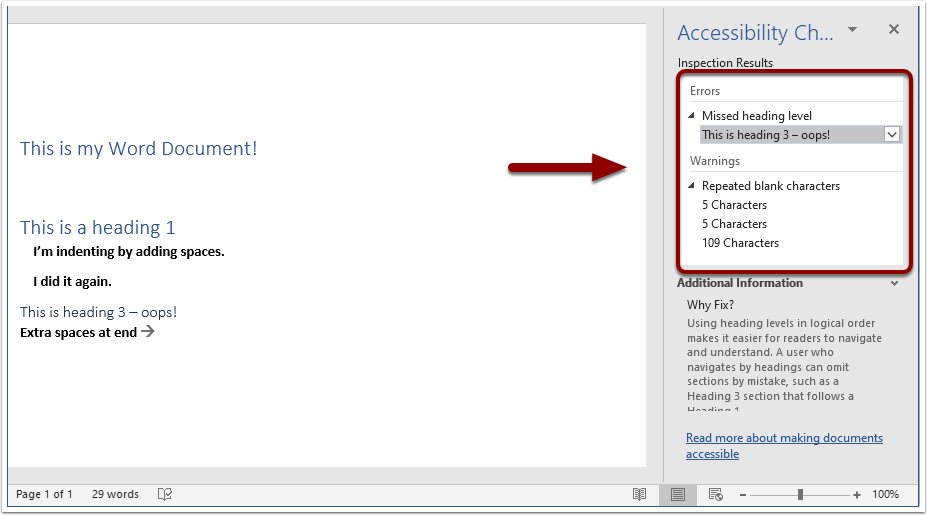
Clicking on one of the items in the results will highlight where there error is in your document.
Clicking the dropdown menu next to the results item will give a recommended action and a link to learn more about the issue. If you click on the recommended action for an item, Word will try to fix the issue for you.
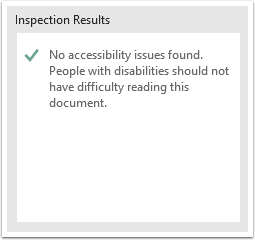
Once you’ve resolved all the issues – either by clicking the recommended actions and having them fixed for you or by fixing them yourself in the document – your Inspection Results will show a check mark and no accessibility issues found.
Please note that there are many issues that make a document inaccessible that the checker may not discover. This is just one tool to help improve your documents. Use this along with your other accessibility workflows to make your documents as accessible as possible!