Finding Forms #
To get to Google Forms, go to forms.google.com
Making a Form #
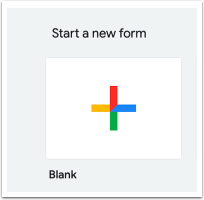
On the forms page, you can start a new form by clicking on the Blank icon under Start a New Form.
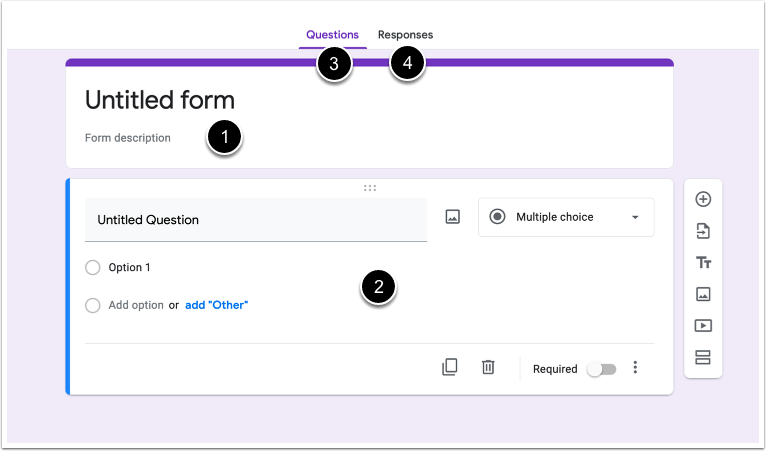
The form edit page shows blank fields for a (1) title and a description, (2) a single blank question, and shows you a tab for the (3) form itself and any (4) responses.
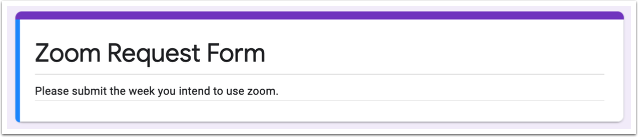
Give your form a title and description – This should tell those that respond to your form what the form is for!
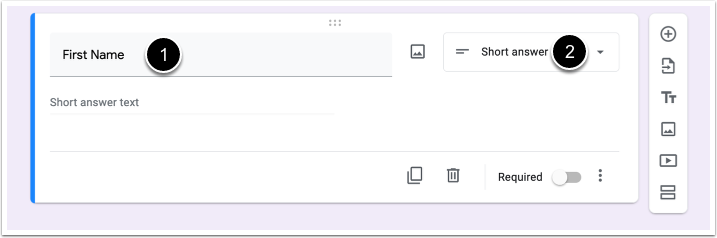
Next, add your first question. Clicking on the title field will expand the editing options for the question. You’ll notice that Google will try to predict what type of question you are asking by the text you put in your question. I typed (1) “First Name” in the question below, and Google changed the question type to (2) “Short answer.”
If the question type needs to be changed, click the drop down menu to see the question type options and pick the option you need.

If you want to force your respondents to answer this question when they fill out your form, click Required below the question options box. When the slider is to the right, this option is turned on.
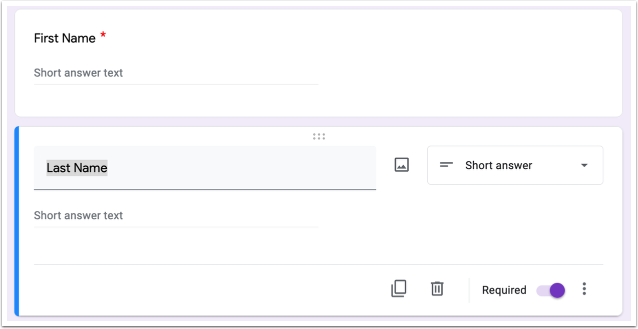
Required questions appear with a red asterisk next to the question.
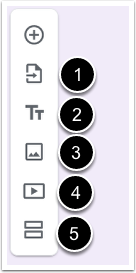
To create another question, click the “plus” icon on the options menu to the right.
Edit your next question just as you did your previous one, continuing to add questions until your form is complete.
In addition to adding a new question, the options menu on the right has icons you can click to:
- Import questions from a different form
- Add other title and descriptions section
- Add an image
- Add a video (from Youtube)
- Add a divider between sections of the form
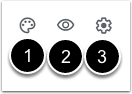
Before finishing, be sure to check the theme customization page to set the color of your form and its background and to pick a header image (if you so desire). Click on the palette icon in the upper right of the page to open (1) Theme options.
To preview your form, click the (2) Preview button next to the Theme icon.
You can also change many options related to your form by clicking the (3) Settings (gear) icon.
Sharing a Form #
Click the Send button to share your form with your respondents.

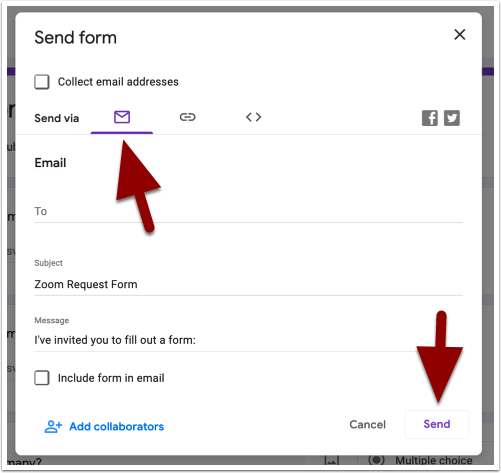
The Send form window should now be open. You have many options for how to send it here. The main options are to send the form via an email, to copy a link, or to embed the form on another web page (such as on a Moodle Page resource).
If you are sending the form via email, you’ll click the Send button when done. If sending a link or embedding it, you’ll click a Copy button instead.
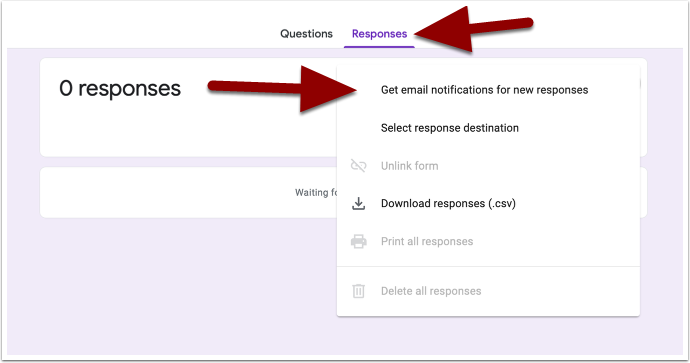
Managing Form Responses #
If you want to get an email notification when someone responds to your form, click on the Responses tab above your form, then click the icon that appears as a vertical column of 3 dots and select Get email notification for new responses. Notice that you can also Select response destination (to have your responses saved in a new Google spreadsheet, for example), delete, print, or even Download responses in a file from this window.